Virtualized NAS with TrueNAS and Proxmox
Sun 03 August 2025I have a Proxmox VE hypervisor running on a server with free resources. Plus, I happen to have a stack of hard disks lying around. And I have the need for some network storage space. The experience I made with some of-the-shelf NAS machine from Qnap wasn't that great: after some years the hardware broke down, and I was lucky to recover my data from it. I had to scrap the Qnap device and was only able to keep the hard drives. That makes me believe I can build my own and achieve a similar level of data security.
I was checking the OpenSource options online, and TrueNAS looked to me as a capable solution. Also, a colleague recommended it to me because he had a good experience virtualizing it with Proxmox VE. So I was checking the TrueNAS documentation and found an article on virtualizing TrueNAS which included some best practices to make that work.
Reading this article, I learned that it's not a good idea to share the same storage controller between the hypervisor itself and the TrueNAS VM. There is a possibility of the hypervisor interfering with settings, reordering or reconfiguring drives, and introducing avenues for data corruption. It's recommended to assign a separate storage controller to the VM via PCI passthrough. This will prevent the hypervisor from claiming the controller with its driver, and allow TrueNAS to use its own.
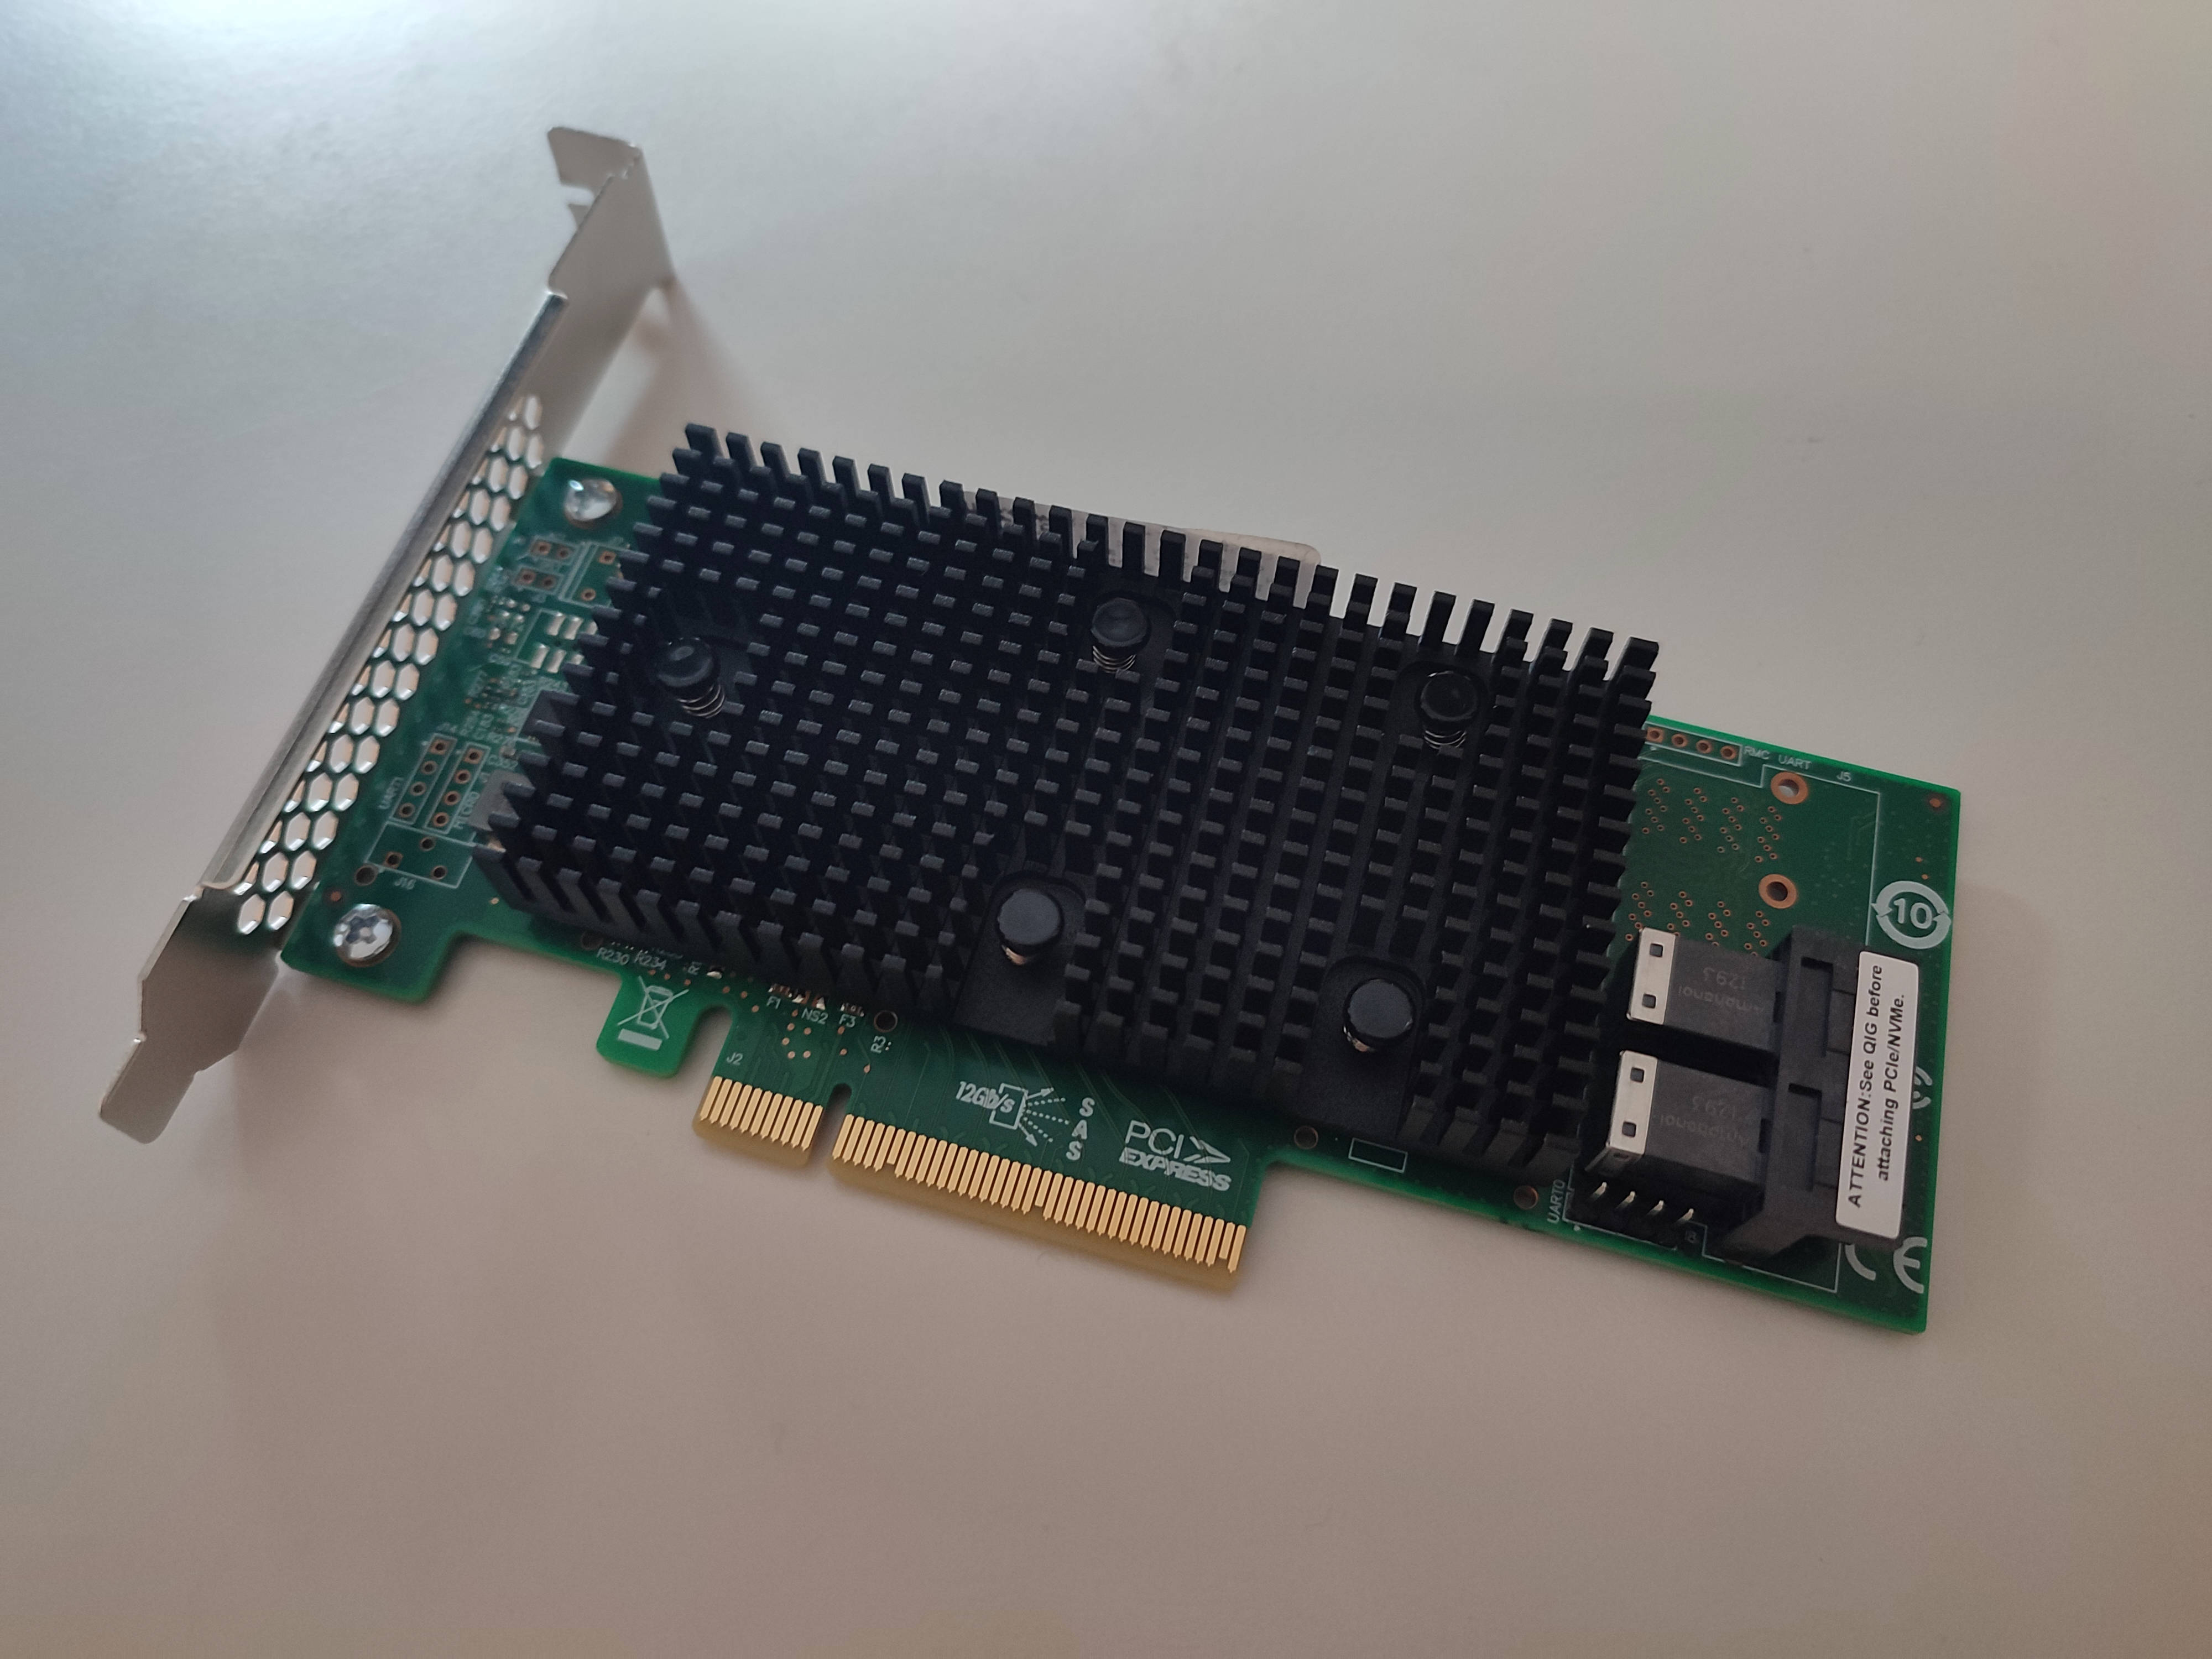
In my case, that means I had to buy some additional hardware, as my server's mainboard only has one storage controller which is already used by the hypervisor. Looking into the TrueNAS hardware guide, I learned that LSI/Broadcom storage controllers are well-supported and recommended. So I ended up with this part list:
- Broadcom 9400-8i
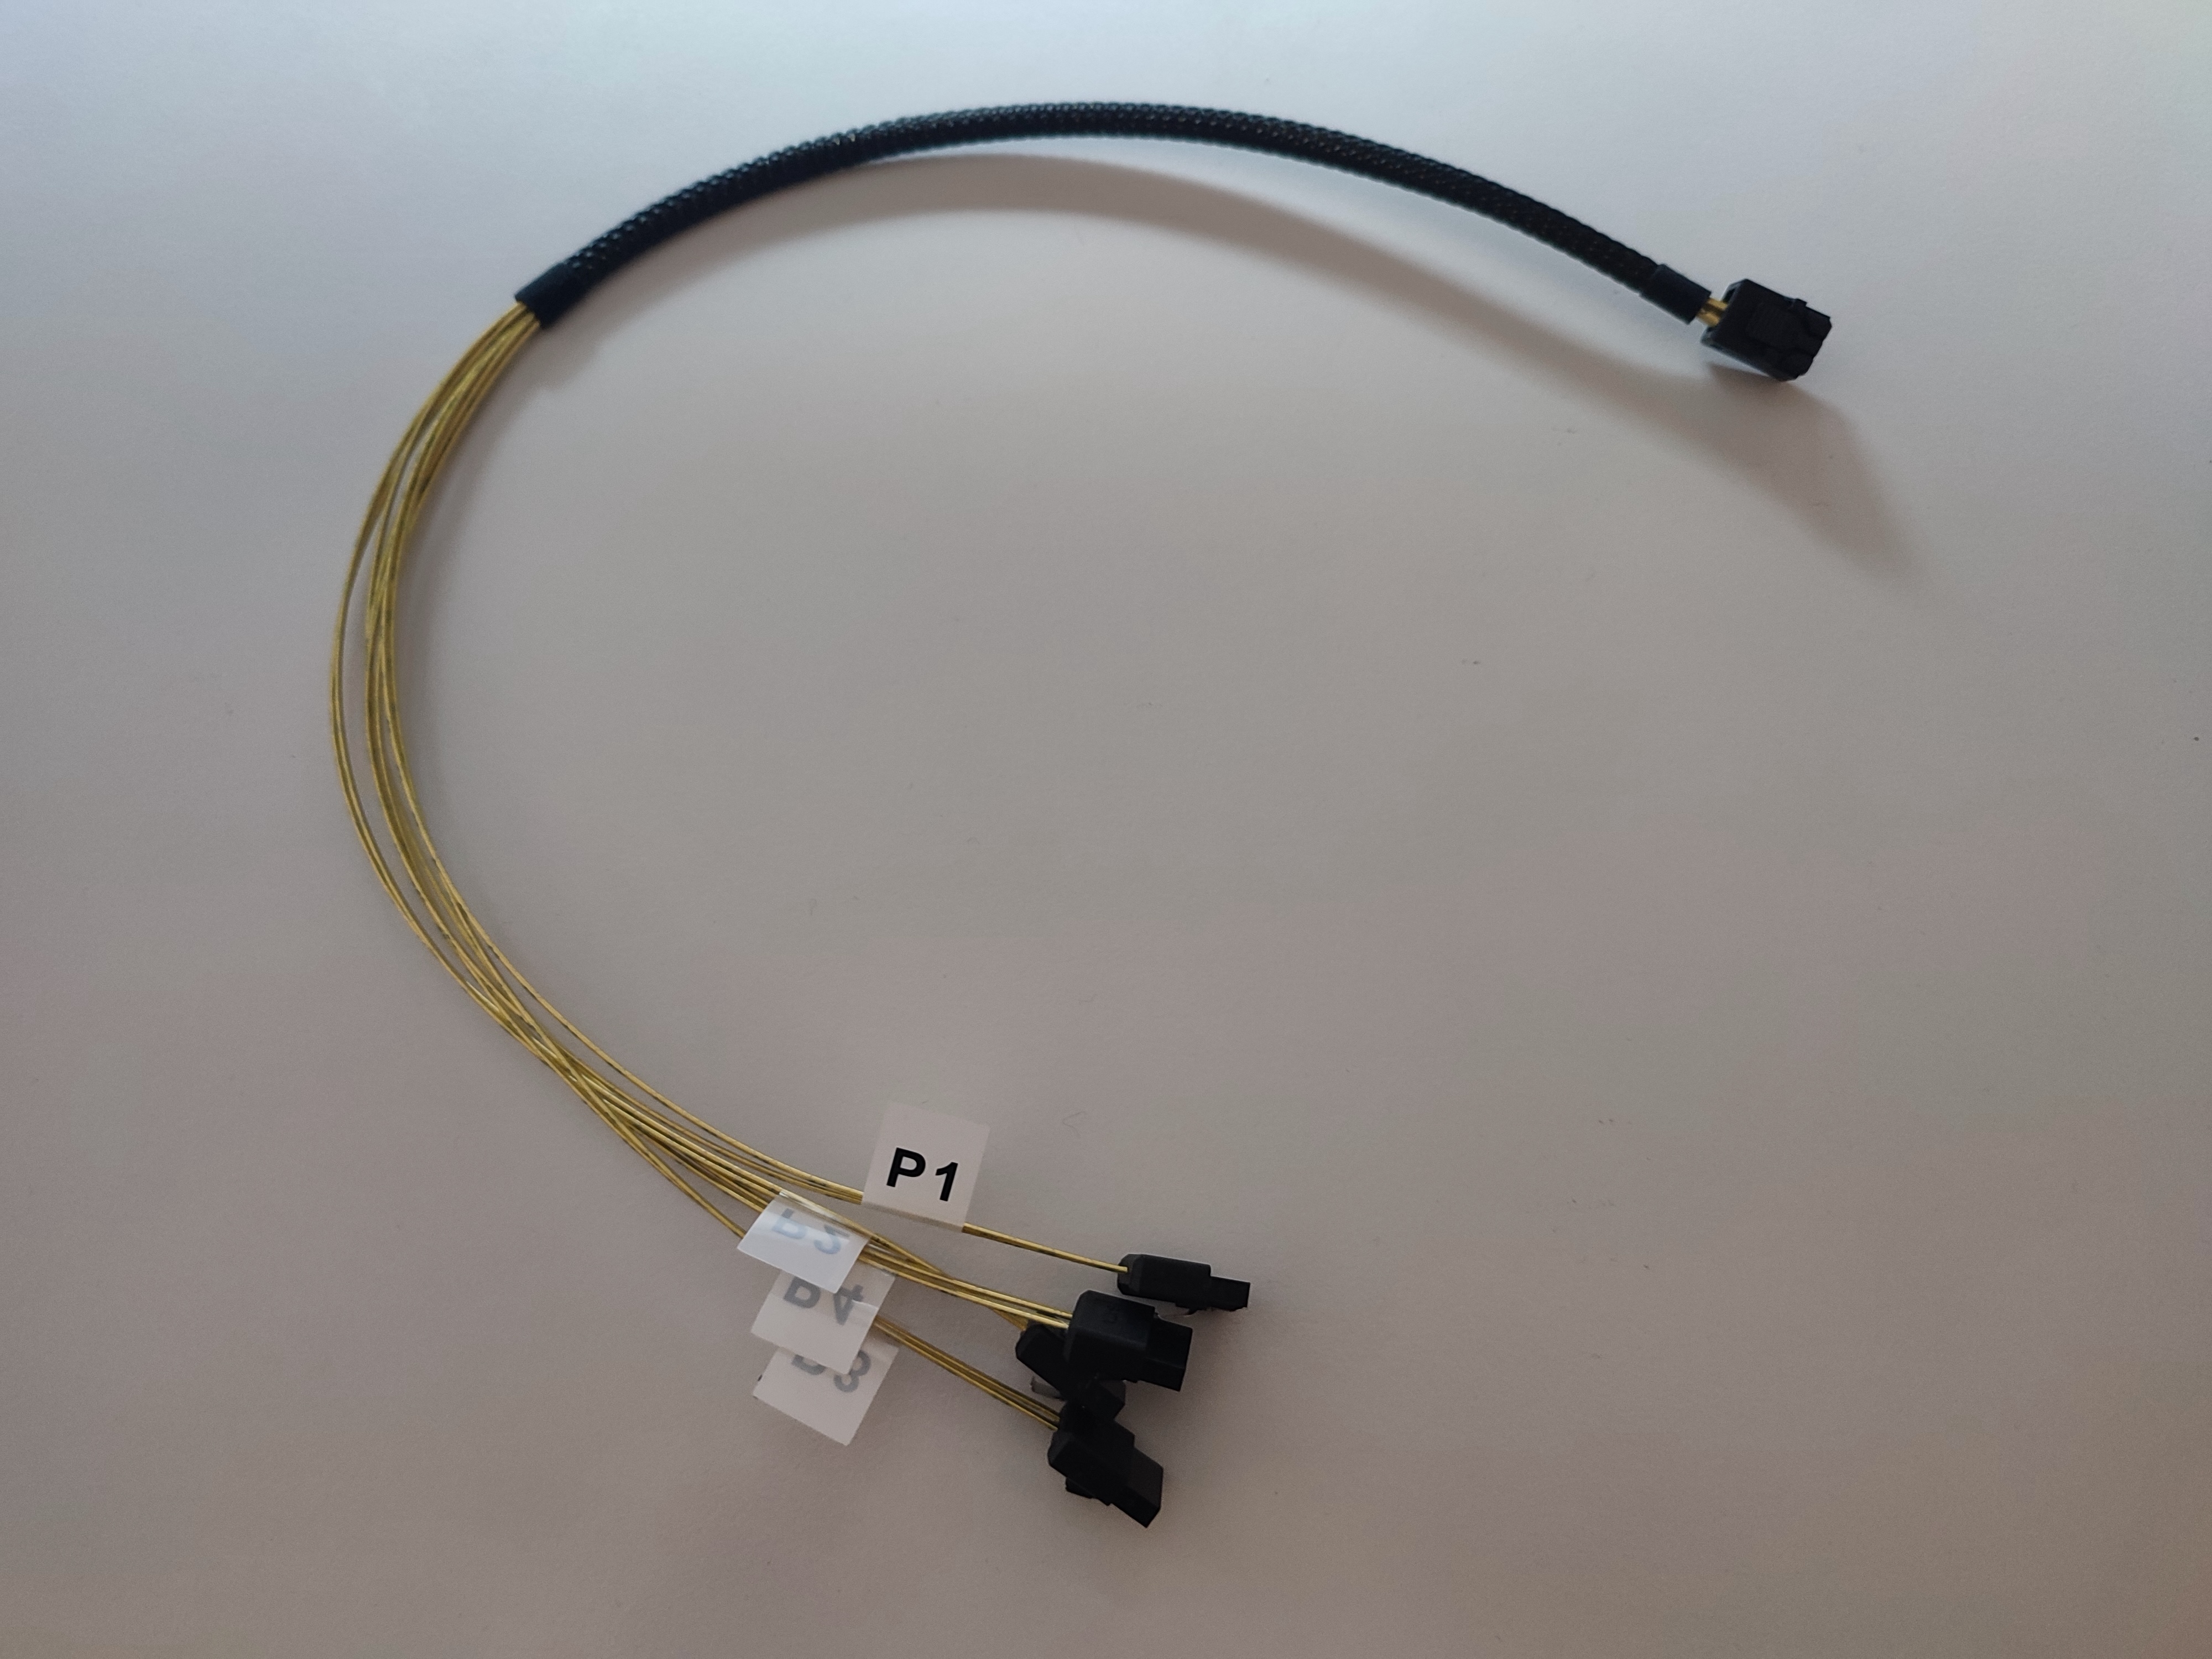
- Delock SAS cable SFF-8643 4xSATA
Hardware installation
The first task was to put the Broadcom controller into a free PCIe slot in my server.
Then I put the hard drives into the server. You need at least four drives to build a decent ZFS RAID. In the TrueNAS docs, they recommend using WD Red drives. This is what I had lying around on my shelf, so I could just grab what I already had. I used the Delock SAS cable to connect four drives to the controller.
I booted the server to check if hardware installation was successful. And it was.
PCIe Passthrough
The TrueNAS article recommended configuring PCIe passthrough for the storage controller card. Reading the Proxmox documentation I learned how to do that:
- enable IOMMU support in my mainboard's bios
- enable IOMMU support in kernel command line parameters
- load IOMMU kernel modules
- make the storage controller unavailable for the hypervisor host
All this might sound complicated, but it's actually straight forward and quickly done when you follow the Proxmox docs.
In my case, my Intel CPU and the mainboard were supporting this technology. I struggled a bit to make the storage
controller card unavailable for the host. I ended up configuring both the vfio options and blacklisting the Broadcom
driver in /etc/modprobe.d/vfio.conf:
options vfio-pci ids=1000:00af
blacklist mpt3sas
Proxmox VM
The Next step is to configure and start the Proxmox VM. First, you need to pull the TrueNAS iso image on your Proxmox
node. I recommend downloading the new TrueNAS Scale Community edition
as this is where the project is moving to.
Following the resource recommendations from the TrueNAS article
and docs
I created a new VM using Proxmox UI with 2 CPUs and 16GB RAM. I selected a q35 machine so I can use PCI-Express
for the storage controller card. TrueNAS offers the option to use redundant disks for the system, so make sure to
create two of them for running TrueNAS itself. Add a CD drive with the TrueNAS iso image mounted.
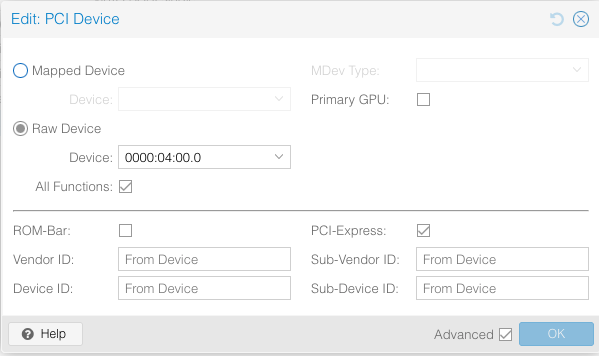
After the VM is created, you need to add the Broadcom storage adapter as a PCI device in the hardware section of the VM.
Choose Raw Device and check the PCI-Express option.
Make sure that the ROM-Bar option is unchecked as this makes the VM trying to load the Broadcom ROM on startup.
If you leave it checked, it causes an "Unable to load Broadcom Inc MPT BIOS" error during startup of the VM. This
does not seem to harm the overall functionality, but makes the startup of the VM very slow and needs human interaction
because you need to hit a key to continue.
TrueNAS Installation
On first boot, the TrueNAS installer kicks in. Install TrueNAS on the two disks which you configured earlier. Unmount the TrueNAS image from the CD drive and reboot the VM. Your TrueNAS installation should come up now.
Using the Proxmox VM console, you can configure additional settings using the Console Setup Menu now. I found the Console Setup Menu's terminology a bit weird: please note that "alias IP addresses" are actually static IP addresses in this menu. I wanted to configure a static IP address for my TrueNAS installation, and it took me a while until I found out about this detail.
TrueNAS configuration
TrueNAS configuration is straight forward and well documented. The TrueNAS web UI should be accessible for you on the configured IP address by now. Just check for it in the Proxmox VM console. It's listed there. You can configure almost anything using the web UI.
The First step is configuring a storage pool with your disks. Then configure your first share.
Conclusion
It was a bit of work to get this going. Overall, I did not face any real issues doing it. So far, it runs reliable in this setup for a while. The only investment I had to do was the Broadcom storage controller and a cable. Although I had some doubts about this approach in the beginning, I found the result rather convincing. So let's see how that goes. I might follow up with another article if I experience problems and do improvements here.